Thunk! Plop! WHACK! About three weeks ago, we awoke to a sound we had never heard in our house. It started gradually at first. Perhaps one unexplained crack! every hour or so. We didn’t give it too much thought as the military training exercises from the nearby base punctuate our peace on a fairly regular basis. The next clue came as I strolled across our “lawn” to my office. Every few feet, I’d glimpse a small brown treasure nestled in the green moss.
Acorns!
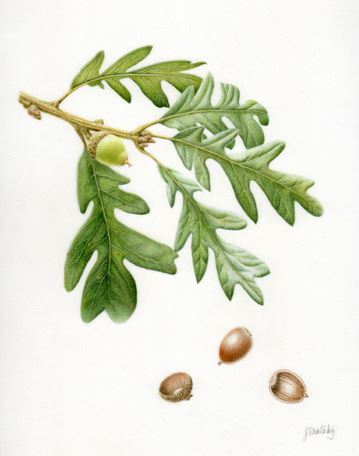
We live in an area that is home to towering, ancient Quercus garryana oaks. These beauties are white oaks and only produce a bountiful acorn harvest once every 4-6 years. We moved to this house five years ago and this is the first year we’ve been able to gather acorns in our own yard as opposed to ferreting them out surreptitiously from our neighbors’ yards while “going for a walk.”
Oaks are abundant across most of the United States, and acorns were a common source of subsistence for native peoples. They skinned and leached the acorns in streams to extract most of the astringent tannins, then ground the acorn meat into meal. There are about 600 varieties of oaks and they fall into two broad categories: red and white. (Kind of like wine!) The acorns are tannin-rich (also like wine!), and like many edible seeds are an excellent source of protein.
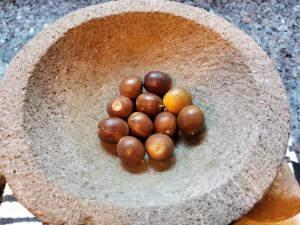
For over two weeks, I happily trotted across our yard every day to hunt acorns. Unlike harvests from previous years – and from other oaks, this year’s acorns from our trees are enormous! The acorn on the left was harvested from white oaks in the neighborhood two years ago. The one in the middle is from red oaks last year (scrounged from my dentist’s parking lot – I looked like a crazy woman stuffing them in my pockets and then emptying them in the back seat of my car). The hefty one on the right is from our yard this year.

Having harvested both kinds, I much prefer the white oak acorns for processing. In my experience, the white oaks have acorns whose skins sometimes come right off when you crack and remove the shell. Red oaks have smaller acorns that are more difficult to skin. (The first time I skinned red oak acorns, I scraped the shells off with my thumbnails. The next morning I woke up with tender, bloody skin under my nails from the exposure to the tannins. Ouch!)
Want to know what kind of oaks you might have around you?
Red oaks White oaks
Pointed leaf tips Rounded leaf tips
Yellow/orange acorns (on inside) White/cream acorns
Fuzzy inner shell Smooth inner shell
Rich in tannic acid (bitter) Lower in tannic acid (less bitter)
After the first bite of an acorn muffin in my ethnobotany apprenticeship, I was hooked. They quickly became my favorite food – especially when eaten with rose petal jelly. But they are definitely a labor of love. First, you have to gather the acorns. That part is fun. It reminds me of an Easter egg hunt, except there is enough for everybody. (No bad childhood memories there. Nope.) Look for acorns that are still slightly unripe (they’ll be lighter in color). I usually choose those that have already lost their little caps. And if it’s an abundant year, go for the biggest ones to save time in processing later.
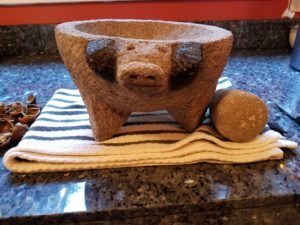
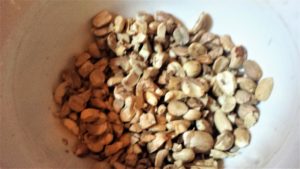
Next, you get to break the shells open and take out the nut inside. That part is fun, too. (It can also be therapeutic if you’re working out some anger issues.) Before I found a molcajete at an antique store, I used a smooth, round rock that fit well in my hand. It’s easy to create acorn shrapnel if you don’t have a molcajete. Smashing the acorns on top of a folded towel on the kitchen counter also does the trick. The laborious part is skinning the acorns.
Making my very first batch of acorn muffins took me weeks. Talk about slow food! It took three days of on-and-off smashing to have enough acorn meat for about two batches of muffins. I spent 2-3 hours each day smashing acorns, peeling off the skins, and leaching the acorns in water. That was when I wasn’t dropping them in disgust when I found grubs inside.
Tip: When gathering acorns, eschew the ones that have a tiny little hole in the side. These are made by acorn weevils. If you see a hole, the grub will be out already, but the inside will be blackened and ruined. Another lesson learned the hard way: In your excitement and haste, don’t gather the first acorns that fall off the tree. They are more likely to have grubs still in them. Plus, they are few and farther between so you’ll spend a lot more time hunting for them. A couple of weeks later, there will be so many acorns on the ground, you can just rake them up.
The next step is to boil the acorns for about 5 minutes, strain, then repeat until the bitterness is removed (you can taste them or see if the water is no longer brown). Or leach them in water for at least 24 hours to remove the bitter tannins. (You can keep the water. The extracted tannins are wonderfully astringent and can be used as a natural – and very effective – facial toner. It’s also good for sunburn, insect bites, or even a mouth wash!)
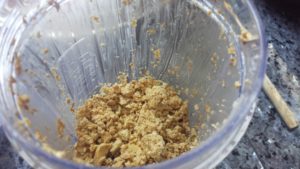
The final step is grinding the acorn meat into meal/flour. I use a Ninja, but a food processor would also work. If the acorns are still wet from the leaching, the meal can pack down quickly. Try emptying the meal, sorting out any remaining chunks, then grinding again. As a reward for your hard work, the acorn meat dutifully fluffs up and expands seemingly exponentially into acorn meal. You end up with more meal than you’d think!
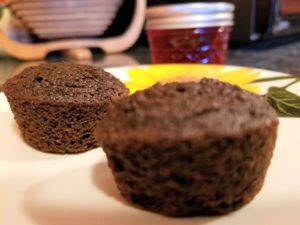
The best part is eating the final product. I have yet to snap a picture of a batch of muffins. They disappear quicker than kids when it’s time to do the dishes. I made my first batch this year for a reunion potluck. I set them out before taking a picture (again), and managed to save two mini-muffins for an unfocused photo before they were all gobbled up. (Notice the rose petal jelly in the background!)
If you’re lucky enough to have access to acorns, try this muffin recipe with herbed butter, honey or your favorite jelly or jam.
BASIC ACORN MUFFINS – based on recipe by Karen Sherwood at Earthwalk Northwest
2 1/2 c. acorn meal
1 T. baking powder
1/2 t. salt
1/4 c. vegetable oil
1/3 c. maple syrup
1 egg
1/3 c. milk
Note 1: The first step can take a while! Plan ahead and have your acorns ready for grinding.
Note 2: Add more acorn meal if too runny or more milk if too thick, depending on the final consistency.
1. Shell acorns. (The number of acorns depends on the kind you have and how large they are.)
2. Leech acorns. (Either boil or soak in water – changing water until it is no longer dark brown.)
3. Grind acorns in blender or food processor. (Small chunks are OK. Re-grind bigger chunks.
4. Set oven to 350 degrees and lightly grease muffin tins (or you can pour into a greased 8×8 baking dish).
5. Combine dry ingredients of acorn meal, baking powder, and salt.
6. Thoroughly blend oil, syrup, egg, and 1/4 c. milk to start.
7. Add wet ingredients to dry ingredients and mix well. Add more milk or acorn meal if needed to meet desired consistency.
8. Bake 20-25 minutes or until a toothpick comes out clean.
You can also freeze unprocessed acorns to enjoy acorn muffins all year long. After all, they are used to being buried in the cold earth! Sun-dry them first with their shell on (protected from squirrels!) to prepare them for storage.